Red Hat, rhel, Satellite, Tech Stuff

Disconnected Red Hat Satellite Upgrade – Upgrading RHEL7 Satellite 6.10 to RHEL8 Satellite 6.13 : Part 1

Do you find your Red Hat Satellite infrastructure environment in desperate need of an upgrade and possibly out of support? If so, this guide is here to help you get back up to a supported version of the OS and the Satellite software.

This guide will show you how to upgrade your Satellite server from Red Hat Enterprise Linux 7 & Satellite 6.10, up to a supported configuration – Red Hat Enterprise Linux 8 & Satellite 6.13.

Most of us may have grown accustomed to seamless updates, real-time data synchronisation, and immediate access to online resources. However, there are many critical infrastructures, secure environments, and sensitive data centres that operate in ‘air-gapped’ or disconnected states for security and compliance reasons. In such settings, maintaining software and ensuring that systems are up-to-date with the latest patches becomes a unique challenge.

This guide aims to demystify the process, offering step-by-step instructions and best practices to ensure your RedHat Satellite remains current, even when it’s isolated from the outside world. Whether you’re an IT administrator working in defence, finance, or any other high-security sector, this guide will help you to navigate the nuances of updating Red Hat Satellite without a direct internet connection.

Step 1 – Preparation

Backup / Snapshot:

Before doing anything, take a backup of the Satellite server. If it is a virtual machine, it can be useful to take a snapshot before doing any changes, in order to revert back quickly if something goes wrong.

Understanding Dependencies / Pre-Requisites:

Ensure that the Satellite server is patched to the latest version of RHEL7 & download all relevant DVD isos of OS and Software required : rhel7, rhel8, Satellite 6.11 (rhel7 & rhel8), Satellite 6.12 (rhel8) & Satellite 6.13 (rhel8).

Assessing the current environment :

It is important to understand what ‘disconnected environment’ really means. For this example, the Satellite server has no access to the Red Hat CDN or any upstream / sync’d repositories. Content has to be synchronised and copied onto the server directly or placed on a host that the Satellite server can access via http. For this guide, the Satellite server has no access to any repositories at all, so we will be working on the assumption that everything has to be copied locally onto the server.

Ensure there is enough disk space on the host especially the / and /var partitions. The upgrade from rhel7 to rhel8 requires a change to the postgresql data directory, so ensure that there is enough space (20GB) in the /var/lib/pgsql partition

Additionally, allow for an additional 10GB for hosting the latest rhel7 and rhel7-extras repositories. In this example, this will be in /var/repos.

Step 2 – Update the RHEL7 OS to latest patches

Before upgrading, it is imperative that the rhel7 server is updated to the latest patches. The LEAPP meta data checks which versions of the packages are required and will upgrade them if needed. However in this example of a disconnected environment, the server has no access to the Red Hat content delivery network, and neither does it subscribe to an upstream satellite server, so the latest rhel-7.9 content has to be imported manually to do the latest updates.

To do this, a helper host which has connectivity to the Red Hat CDN is required, with the reposync and yum-utils packages installed. This host is used to create a local mirror of the rhel7 repository and then transfer the content to the disconnected Satellite server.

On the connected host – Ensure it has a valid subscription and is registered, using subscription manager. Enable the rhel-7-server-rpms and rhel-7-server-extras-rpms repositories.

# subscription-manager repos enable rhel-7-server-rpms rhel-7-server-extras-rpms

Create the local mirror repositories:

# mkdir -p /var/repos
# reposync --gpgcheck -l --repoid=rhel-7-server-rpms --download_path=/var/repos --downloadcomps --download-metadata
# reposync --gpgcheck -l --repoid=rhel-7-server-extras-rpms --download_path=/var/repos --downloadcomps --download-metadata
# createrepo -v /var/repos/rhel-7-server-rpms -g comps.xml
# createrepo -v /var/repos/rhel-7-server-extras-rpms -g comps.xml
# tar -czvf rhel-7-repos.tar.gz /var/repos/*

Copy the tar files to the disconnected satellite server and untar in the /media directory (create the /media directory if required – ensuring there is enough space on the partition)

On the disconnected Server : Create the repository file in /etc/yum.repos.d

# cat <<EOF > /etc/yum.repos.d/rhel7.repo
[rhel-7-server-rpms]
baseurl=file:///media/rhel-7-server-rpms
name=rhel-7-server-rpms
enabled=1
gpgcheck=0

[rhel-7-server-extras-rpms]
baseurl=file:///media/rhel-7-server-extras-rpms
name=rhel-7-server-extras-rpms
enabled=1
gpgcheck=0
EOF

Update the host to the latest rhel7 packages:

# yum update -y

Step 3 – Download & Mount ISOs

Download the Red Hat 8.8 and Satellite 6.11, 6.12 & 6.13 dvd isos from the Red Hat portal. As of writing this, Satellite 6.11.5.4 is the latest version for RHEL7.

Download 6.11.5.4 iso for both RHEL7 & RHEL8 and copy them onto the disconnected Satellite server, along with the RHEL8.8 DVD iso.

Create the directories for all the media and mount the images to the respective directories:

# mkdir -p /media/{rhel-8,satellite-6.11-rhel8,satellite-6.11-rhel7}
# mount -o loop /var/isos/rhel-8.8-x86_64-dvd.iso /media/rhel-8
# mount -o loop /var/isos/Satellite-6.11.5.4-rhel-8-x86_64.dvd.iso /media/satellite-6.11-rhel8
# mount -o loop /var/isos/Satellite-6.11.5.4-rhel-7-x86_64.dvd.iso /media/satellite-6.11-rhel7

Mount all of the isos into the respective directories, once this is done – the next thing to do is to create the repositories for the server to use.

Setup the RHEL7, Satellite 6.11 Repositories

Create the yum repo files and ensure the base urls point to file:///media/<repo> :

# cat <<EOF > /etc/yum.repos.d/satellite-6.11-rhel7.repo
[satellite-6.11-rhel-7]
baseurl=file:///media/satellite-6.11-rhel7/Satellite
name=Satellite-6.11-rhel8
enabled=1
gpgcheck=0

[satellite-maintence-6.11-rhel-7]
baseurl=file:///media/satellite-6.11-rhel7/Maintenance/
name=Satellite-Maintenance-6.11-rhel8
enabled=1
gpgcheck=0

[ansible-rhel-7]
baseurl=file:///media/satellite-6.11-rhel7/ansible/
name=Ansible-rhel7
enabled=1
gpgcheck=0

[rhel-7-server-rhscl-rpms]
baseurl=file:///media/satellite-6.11-rhel7/RHSCL/
name=rhel-7-software-collections
enabled=1
gpgcheck=0
EOF

A yum repo list will now show all of the necessary repositories for upgrading the Satellite Server.

Upgrade Satellite Server to 6.11

We are now in a position to update the Satellite server to 6.11. Follow these instructions to upgrade the Satellite Server to 6.11. Steps 12 to 16 have been completed above. Every environment is different, so follow the instructions necessary for your environment. This guide is only showing you how to get your disconnected Satellite in a position where it can be upgraded.

Depending on how you got to Satellite 6.10 (i.e. Upgrade from 6.9 or fresh install of 6.10) you may need to create the /var/lib/pulp/media/artifact directory:

# mkdir -p /var/lib/pulp/media/artifact
# chown -hR pulp:pulp /var/lib/pulp/media/artifact

Run the command to check that there is an upgrade available:

# satellite-maintain upgrade list-versions
# satellite-maintain upgrade check --target-version 6.11 \
--whitelist="repositories-validate,repositories-setup"

You may have to add a few whitelists, for example if you have any non Red Hat packages. Once satisfied that all the checks are successful, do a backup / snapshot then commence the upgrade by running the following command:

# satellite-maintain upgrade run --target-version 6.11 \
--whitelist="repositories-validate,repositories-setup"

This upgrade process should complete in approx 45 mins, you may be asked if you want to clean up old tasks – agree to that, and by the end of it you will now be running up to date rhel7.9 & Satellite 6.11

The next step is to upgrade from Red Hat Enterprise Linux 7 to Red Hat Enterprise Linux 8.

This is described in part 2 ->

I like sharing my knowledge and experiences, in the hope that is helps others. Feel free to add comments / suggestions and if you found that this was helpful, and would like to shout me a coffee, that would be appreciated!

Buy Me A Coffee
Red Hat, rhel, Satellite

Disconnected Red Hat Satellite Upgrade – Upgrading RHEL7 Satellite 6.10 to RHEL8 Satellite 6.13 : Part 2

Following on from the previous post, you should now have a Satellite Server that is running Red Hat Enterprise Linux 7.9 with the latest patches and Satellite 6.11.5.4.

The next step of this guide is to upgrade the Satellite Server operating system from to Red Hat Enterprise Linux 8.8 – Using the LEAPP upgrade process.

Preparing for the LEAPP upgrade

This process involves following these guidelines, but for a disconnected environment.

Download required LEAPP packages on to a connected host

The leapp packages must be downloaded on a connected helper host and then copied over to the disconnected Satellite server for local installation:

[connected-host] # yum --downloadonly --downloaddir=/var/tmp/leapp-files install leapp-upgrade
[connected-host] # tar -cvf leapp-packages.tar /var/tmp/leapp-files/*

Copy the tar file to the satellite server and install the packages

[satellite-server] # mkdir /var/tmp/leapp-files
[satellite-server] # tar -xf leap-packages.tar -C /var/tmp/leapp-files
[satellite-server] # foreman-maintain packages unlock
[satellite-server] # yum install -y /var/tmp/leapp-files/*.rpm
[satellite-server] # foreman-maintain packages lock

Prepare yum repos for LEAPP Upgrade

From the previous post, the rhel8.8 DVD iso was mounted in /media/rhel-8 and the Satellite repositories were configure using the mounted Satellite DVD isos. However, the leapp utility cannot read file:/// based repositories, requiring http based repos only. In order to facilitate this, we will use the Satellite’s public HTML directory to provide html repositories.

Create a symlink from /media to /var/www/html/pub

[satellite-server] # ln -s /media /var/www/html/pub/media

Update the Satellite yum repositories to point the local http server and relevant path:

[satellite-server] # cat <<EOF> /etc/yum.repos.d/satellite-6.11-rhel8.repo
[satellite-6.11-rhel8]
baseurl=http://rhel7-satellite-demo/pub/media/satellite-6.11-rhel8/Satellite
name=Satellite-6.11-rhel8
enabled=1
gpgcheck=0

[satellite-maintenance-6.11-rhel8]
baseurl=http://rhel7-satellite-demo/pub/media/satellite-6.11-rhel8/Maintenance/
name=Satellite-Maintenance-6.11-rhel8
enabled=1
gpgcheck=0
EOF

Disable the rhel7 and Satellite-6.11-rhel7 repositories:

[satellite-server] # sed -i 's/enabled=1/enabled=0/g' /etc/yum.repos.d/rhel7.repo
[satellite-server] # sed -i 's/enabled=1/enabled=0/g' /etc/yum.repos.d/satellite-6.11-rhel7.repo

Pre-requisite tasks for LEAPP upgrade

Two kernel modules must be removed prior to the upgrade process : floppy & pata_acpi

[satellite-server] # rmmod floppy pata_acpi

Ensure that there are no NFS mount points specified in /etc/fstab:

[satellite-server] # sed -i '/\bnfs(4)?\b/s/^/#/' /etc/fstab

Run LEAPP preupgrade check

Run the leapp preupgrade command to perform the pre-upgrade phase:

[satellite-server] # leapp preupgrade --no-rhsm --iso /<path>/rhel-8-dvd.iso --enablerepo=satellite-6.11-rhel8 --enablerepo=satellite-maintenance-6.11-rhel8

Once the pre-upgrade checks have been completed, a report and an answerfile is generated in /var/log/leapp/answerfile. The file can either be edited to provide the answer to the removal of pam_pkcs11 module (uncomment the line and confirm answer as True) or run the following command:

[satellite-server] # leapp answer --section remove_pam_pkcs11_module_check.confirm=True

Re-run the leapp preupgrade command again and confirm that there are no unresolved issues or inhibitors.

Backup / Snapshot

At this stage it is highly recommended to backup or take a snapshot of the Satellite server before performing the upgrade.

Upgrade to RHEL8 using LEAPP utility

To upgrade the Satellite server to RHEL8 using the leapp utility, run the following command:

[satellite-server] # leapp upgrade --no-rhsm --iso /<path>/rhel-8-dvd.iso --enablerepo=satellite-6.11-rhel8 --enablerepo=satellite-maintenance-6.11-rhel8

The upgrade process will start. It will determine the packages it requires and at some point will reboot and continue the upgrade. Once it has completed the last stages of the upgrade process it will reboot a few times and the Satellite server will now be running RHEL8. This process can take up to an hour. Once that is completed, there are some post-upgrade tasks which are required.

Post Upgrade Tasks

Once the upgrade has been completed, complete the following post-ugprade tasks:

Check Satellite Service Status

You may run into an error where Satellite services are not started correctly and/or httpd does not start because of an error. If so run the following command to check the service status:

# satellite-maintain service list

If you find that any services are disabled, then use the following command to enable them:

# satellite-maintain service enable --only dynflow-sidekiq@,foreman-proxy,httpd,postgresql,puppetserver,redis,tomcat

The httpd service may not start due to the duplicate loading of the mpm module, if that is the case disabled the module in the file

# vi /etc/httpd/conf.modules.d/00-mpm.conf

Setup the RHEL8 Repo from the install media

cat <<EOF> /etc/yum.repos.d/rhel-8.repo
[BaseOS]
name=Red Hat Enterprise Linux 8 for x86_64 BaseOS
baseurl=file:///media/rhel-8/BaseOS
gpgcheck=0
enabled=1
 
[AppStream]
name=Red Hat Enterprise Linux 8 for x86_64 AppStream
baseurl=file:///media/rhel-8/AppStream
gpgcheck=0
enabled=1
EOF

Remove

yum config-manager --save --setopt exclude=''
cd /lib/modules && ls -d *.el7*
[ -x /usr/sbin/weak-modules ] && /usr/sbin/weak-modules --remove-kernel 3.10.0-1160.25.1.el7.x86_64
/bin/kernel-install remove 3.10.0-1160.25.1.el7.x86_64 /lib/modules/3.10.0-1160.25.1.el7.x86_64/vmlinuz
rpm -qa | grep -e '\.el[67]' | grep -vE '^(gpg-pubkey|libmodulemd|katello-ca-consumer)' | yum remove
yum remove leapp-deps-el8 leapp-repository-deps-el8
rm -rf /lib/modules/*el7*
rm -rf /var/log/leapp /root/tmp_leapp_py3 /var/lib/leapp
rm -rf /boot/vmlinuz-*rescue* /boot/initramfs-*rescue*
dnf reinstall -y kernel-core-$(uname -r)
grubby --info=ALL | grep "\.el7" || echo "Old kernels are not present in the bootloader."

If there are still el7 kernels, find them and remove them:

rpm -q kernel|grep el7
dnf remove kernel-<version>.el7.x86_64
grubby --remove-kernel=/boot/vmlinuz-<version>.el7.x86_64

ls /boot/vmlinuz-*rescue* /boot/initramfs-*rescue*
lsinitrd /boot/initramfs-*rescue*.img | grep -qm1 "$(uname -r)/kernel/" && echo "OK" || echo "FAIL"
grubby --info $(ls /boot/vmlinuz-*rescue*)

This completes the upgrade from Red Hat Enterprise Linux 7 to Red Hat Enterprise 8.

Update to latest RHEL8 Packages

The Satellite server has now been upgraded to RHEL8, but is not completely up to date with the latest security patches and bug fixes. The next step is to synchronise the BaseOS and AppStream repositories, using a helper host and then transfer the content onto the Satellite server in order to perform the update.

Use connected helper host to sync RHEL8 OS & Satellite repos

Use the reposync tool on the connected host to copy the rhel8 BaseOS and AppStream repositories. What I prefer to do is create a separate logical volume for the repository data : /repos

This allows me to manage the content separately from the rest of the OS on the connected host.

[connected-host] # reposync --gpgcheck --newpackage --download-metadata --repoid=rhel-8-for-x86_64-baseos-rpms -p /repos/
[connected-host] # reposync --gpgcheck --newpackage --download-metadata --repoid=rhel-8-for-x86_64-appstream-rpms -p /repos/

Once completed tar the rhel-8-for-x86_64-baseos-rpms and rhel-8-for-x86_64-appstream-rpms directories in the /repo directory and copy them across to the disconnected Satellite server.

Create the local repos on the Satellite server

On the Satellite server, create an additional logical volume /repos and upack the tar files into that directory.

Create the yum repo with the following command:

[satellite-server] # cat <<EOF> /etc/yum.repos.d/rhel8-local.repo
[rhel-8-for-x86_64-baseos-rpms]
name=Red Hat Enterprise Linux 8 for x86_64 BaseOS
baseurl=file:///repos/rhel-8-for-x86_64-baseos-rpms
gpgcheck=1
enabled=1

[rhel-8-for-x86_64-appstream-rpms]
name=Red Hat Enterprise Linux 8 for x86_64 AppStream
baseurl=file:///repos/rhel-8-for-x86_64-appstream-rpms
gpgcheck=1
enabled=1
EOF

The Satellite server can now update

Buy Me A Coffee
Tech Stuff

Upgrading a Slow Laptop

A friend of mine was complaining about her slow laptop. She bought it when she was studying and said that over time, it just became slower and slower, until it was unusable. She was considering ditching it and then buying a new one until I said I would have a look at it.

She was quite frustrated because she had not the laptop that long and thought ‘what a waste’ that a laptop can become so ‘old’ so quickly.

So, I had a quick look at the specs – 4GB RAM, 1TB 5400rpm mechanical disk … I told her I would upgrade it for her.

This is really a cheap, simple upgrade, which will prolong the lifespan of the laptop for years and I’m going to show you how to do it using a Mac (If you are using Linux, then you probably don’t need these instructions).

You need a few things:

  • Small screwdriver set
  • An antistatic mat to work on
  • A small tub to keep the laptop screws in one place
  • 8GB (or 16GB) RAM module (Most likely DDR4, but you need to check what you need) – Amazon
  • SSD Hard Drive (Get the same size as the disk you have) – Amazon
  • 2 x SATA to USB cables – Amazon

Step 1 – Setup the anti-static mat and with your small screwdriver set, open your laptop up and check your RAM and Hard Drive and then order what you need above. For this upgrade, I needed 1 TB SSD disk and DDR4 3200MHz RAM

Step 2 – Remove the RAM and replace it with the RAM you purchased. This will immediately make a difference to the computer’s performance. But the real benefit is when you change the hard drive from a mechanical, spinning disk, to a Solid State disk

Step 3 – Remove the Hard Drive from the SATA interface. It should just slide out. There may be a couple of screws holding it in place, there may also be a frame/housing for the drive. If so, remove them and set them aside.

Step 4 – Using the SATA to USB cables, plug in the old drive and the new drive into the Mac. You may get a message about unreadable disk when you plug the new disk in … Click ignore.

** If you have USB ports on both sides of the laptop, plug one disk into one side and the other disk to the other side. This is a long process and using USB ports on the same bus will cause contention and half the speed it takes to copy the data.

You are now ready to copy the data from the old disk to the new disk! You are going to use the ‘dd’ command to do this, so you will need to use the Terminal application on the Mac.

‘dd’ is a data duplicator, it is a versatile utility used primarily for copying and converting data at a raw level.

Let’s start by looking at the attached disks using the diskutil command:

$ sudo diskutil list
/dev/disk0 (internal, physical):
#: TYPE NAME SIZE IDENTIFIER
0: GUID_partition_scheme *1.0 TB disk0
1: EFI EFI 314.6 MB disk0s1
2: Apple_APFS Container disk1 1.0 TB disk0s2

/dev/disk1 (synthesized):
#: TYPE NAME SIZE IDENTIFIER
0: APFS Container Scheme - +1.0 TB disk1
Physical Store disk0s2
1: APFS Volume Macintosh HD 23.5 GB disk1s1
2: APFS Snapshot com.apple.os.update-... 23.5 GB disk1s1s1
3: APFS Volume Macintosh HD - Data 591.3 GB disk1s2
4: APFS Volume Preboot 526.2 MB disk1s3
5: APFS Volume Recovery 1.1 GB disk1s4
6: APFS Volume VM 3.2 GB disk1s5

/dev/disk2 (external, physical):
#: TYPE NAME SIZE IDENTIFIER
0: GUID_partition_scheme *1.0 TB disk2
1: EFI SYSTEM_DRV 272.6 MB disk2s1
2: Microsoft Reserved 16.8 MB disk2s2
3: Microsoft Basic Data Windows 474.6 GB disk2s3
(free space) 524.3 GB -
4: Windows Recovery 1.0 GB disk2s4

/dev/disk3 (external, physical):
#: TYPE NAME SIZE IDENTIFIER
0: *1.0 TB disk3

The diskutil command shows the two EXTERNAL disks /dev/disk2 and /dev/disk3. The important thing to note is which is the old laptop disk and which is the new disk – You can see that /dev/disk2 has all the Windows / Microsoft partitions and the new disk /dev/disk3 is completely empty, so the old one is disk2 and new one is disk3.

You are going to copy everything from /dev/disk2 to /dev/disk3 – IMPORTANT : doing it the other way will wipe all the data from the old disk! Ensure you follow the next step correctly.

Using the dd command, copy the data from /dev/disk2 (Old Disk) to /dev/disk3 (New Disk) using the following command:

$ sudo dd if=/dev/disk2 of=/dev/disk3 bs=4M status=progress

This command will copy every bit of data from disk2 to disk3 … Make sure you get this the correct way around or you will lose your data!

Be advised that this command takes a LONG time. For a 1TB disk, this takes about 25 hours!! Keep checking the progress.

Once it finishes, check that the 2 disks look identical :

$ sudo diskutil list
Password:
/dev/disk0 (internal, physical):
   #:                       TYPE NAME                    SIZE       IDENTIFIER
   0:      GUID_partition_scheme                        *1.0 TB     disk0
   1:                        EFI EFI                     314.6 MB   disk0s1
   2:                 Apple_APFS Container disk1         1.0 TB     disk0s2

/dev/disk1 (synthesized):
   #:                       TYPE NAME                    SIZE       IDENTIFIER
   0:      APFS Container Scheme -                      +1.0 TB     disk1
                                 Physical Store disk0s2
   1:                APFS Volume Macintosh HD            23.5 GB    disk1s1
   2:              APFS Snapshot com.apple.os.update-... 23.5 GB    disk1s1s1
   3:                APFS Volume Macintosh HD - Data     601.2 GB   disk1s2
   4:                APFS Volume Preboot                 526.2 MB   disk1s3
   5:                APFS Volume Recovery                1.1 GB     disk1s4
   6:                APFS Volume VM                      3.2 GB     disk1s5

/dev/disk2 (external, physical):
   #:                       TYPE NAME                    SIZE       IDENTIFIER
   0:      GUID_partition_scheme                        *1.0 TB     disk2
   1:                        EFI SYSTEM_DRV              272.6 MB   disk2s1
   2:         Microsoft Reserved                         16.8 MB    disk2s2
   3:       Microsoft Basic Data Windows                 474.6 GB   disk2s3
                    (free space)                         524.3 GB   -
   4:           Windows Recovery                         1.0 GB     disk2s4

/dev/disk3 (external, physical):
   #:                       TYPE NAME                    SIZE       IDENTIFIER
   0:      GUID_partition_scheme                        *1.0 TB     disk3
   1:                        EFI SYSTEM_DRV              272.6 MB   disk3s1
   2:         Microsoft Reserved                         16.8 MB    disk3s2
   3:       Microsoft Basic Data Windows                 474.6 GB   disk3s3
                    (free space)                         524.3 GB   -
   4:           Windows Recovery                         1.0 GB     disk3s4

Step 5 – Put the new drive back into the laptop.

Once the copy is complete and you can see the above that both disks look the same, put the new disk into the laptop and power the laptop on. You should now notice a significant speed increase!

If you found this information helpful, feel free to buy me a coffee by clicking the link below. Thanks!

Buy Me A Coffee
openshift, Tech Stuff

Updating Disconnected OpenShift Clusters

Intro

Disconnected OpenShift clusters are becoming increasingly popular, as more and more organisations seek to deploy and manage their own private cloud environments. In this blog post, I will show you how to mirror repository content to update a disconnected OpenShift cluster as well as some best practices for managing your environment.

Disconnected OpenShift clusters are important for a number of reasons. First and foremost, they allow organisations to maintain complete control and security over their environment, without relying on external sources for updates, patches, or security fixes. This is especially important for organisations that operate in highly regulated industries, where data privacy and security are paramount.

Updating a disconnected OpenShift cluster can be a complex process, but it’s not impossible. Here are the basic steps:

  1. Set up a local mirror repository: A local mirror repository is a copy of the OpenShift container images that you’ll use to install and manage your cluster. You can create a mirror using the oc-mirror plugin.
  2. Move the mirrored content into the registry in the disconnected / isolated environment.
  3. Configure the cluster to use the local, mirrored registry: Once you have a local mirror registry, you’ll need to apply the manifests to configure the OpenShift cluster to use it.
  4. Update the cluster!
  5. Manage the cluster: Once your disconnected cluster is updated, you’ll need to manage it. This includes applying updates, patches, and security fixes. To do this, you’ll need to periodically update your local mirror repository with the latest container images.

The oc-mirror plugin is a command-line tool that can be used to mirror images, manifests, and other artifacts, from external repositories in order to sync them to a mirrored registry for use by a disconnected cluster. This is an essential tool for organisations that need to manage OpenShift clusters in remote or offline environments.

The oc-mirror plugin works by creating a local mirror of the upstream repositories into a local registry or filesystem on removable media. This can then transferred into the disconnected environment, to update or deploy OpenShift applications and services in the disconnected cluster.

The oc-mirror plugin is a powerful tool that can be used to manage OpenShift clusters in disconnected environments. It is easy to use and can be used to mirror a wide range of artifacts from a connected cluster.

Pre-Reqs – Things you need.

  • A host which has connectivity to the upstream repositories and has the oc-mirror plugin installed
  • Pull secret from console.redhat.com to access the repositories

Download & Install oc-mirror plugin

Download the oc-mirror CLI plugin from the Downloads page of the OpenShift Cluster Manager Hybrid Cloud Console.

Extract the archive:

$ tar xvzf oc-mirror.tar.gz

If necessary, update the plugin file to be executable:

$ chmod +x oc-mirror

Copy the oc-mirror binary to /usr/local/bin

Download Pull Secret

Download the registry.redhat.io pull secret from the Red Hat OpenShift Cluster Manager.

Make a copy of your pull secret in JSON format:

cat ./pull-secret | jq . > <path>/<pull_secret_file_in_json>

Save the file either as ~/.docker/config.json or $XDG_RUNTIME_DIR/containers/auth.json on both the connected host and the host in disconnected environment.

Generate the base64-encoded user name and password or token for your mirror registry:

echo -n '<user_name>:<password>' | base64 -w0

Edit the JSON file and add a section that describes your registry to it:

  "auths": {
        "<mirror_registry>": {
        "auth": "<credentials>",
        "email": "you@example.com"
        }
  },

The JSON file should look like this:

{
  "auths": {
        "registry.example.com": {
        "auth": "BGVtbYk3ZHAtqXs=",
        "email": "you@example.com"
        },
        "cloud.openshift.com": {
        "auth": "b3BlbnNo...",
        "email": "you@example.com"
        },
        "quay.io": {
        "auth": "b3BlbnNo...",
        "email": "you@example.com"
        },
        "registry.connect.redhat.com": {
        "auth": "NTE3Njg5Nj...",
        "email": "you@example.com"
        },
        "registry.redhat.io": {
        "auth": "NTE3Njg5Nj...",
        "email": "you@example.com"
        }
  }
}

Step 1 : Mirror the Content Using oc-mirror

First thing that needs to be done is to mirror the content and the first thing to check is the update path, which can be found here

Once you have identified your upgrade path, you need to take note of all the releases you need to get to the desired release, as you will have to configure the ImageSetConfiguration to mirror all of the releases and operators, you require. 

First you need to install oc mirror plugin on a host that has connectivity to the upstream content – details are here

Next, you have to configure the imageset-config.yaml to specify what you need to mirror. The below ImageSetConfiguration.yaml file is an example :
apiVersion: mirror.openshift.io/v1alpha2
archiveSize: 4                                                  
storageConfig:                                                  
  registry:
imageURL: <quay.domain.com/mirror/oc-mirror-metadata>             
skipTLS: false
mirror:
  platform:
channels:
   - name: stable-4.11
     minVersion: 4.11.0
     maxVersion: 4.11.40
     shortestPath: True
   - name: stable-4.12
     minVersion: 4.12.17
     maxVersion: 4.12.17                                        
   type: ocp
graph: true
   operators:                                               
   - catalog: registry.redhat.io/redhat/redhat-operator-index:v4.11
    packages:
    - name: rhacs-operator
      channels:
      - name: stable-4.11
    - name: odf-operator
      channels:
      - name: stable-4.11
    - name: local-storage-operator
      channels:
      - name: stable-4.11
    - name: odf-csi-addons-operator
      channels:
      - name: stable-4.11
    - name: ocs-operator
      channels:
      - name: stable-4.11
    - name: mcg-operator
      channels:
      - name: stable-4.11
    - name: openshift-gitops-operator
      channels:
      - name: stable-4.11
    - name: oadp-operator
      channels:
      - name: stable-4.11
    - name: pipelines-operator
      channels:
      - name: stable-4.11
    - name: openshift-update-service
      channels
      - name: stable-4.11 
       - catalog: registry.redhat.io/redhat/redhat-operator-index:v4.12
    packages:
    - name: rhacs-operator
      channels:
      - name: stable-4.12
    - name: odf-operator
      channels:
      - name: stable-4.12
    - name: local-storage-operator
      channels:
      - name: stable-4.12
    - name: odf-csi-addons-operator
      channels:
      - name: stable-4.12
    - name: ocs-operator
      channels:
      - name: stable-4.12
    - name: mcg-operator
      channels:
      - name: stable-4.12
    - name: openshift-gitops-operator
      channels:
      - name: stable-4.12
    - name: oadp-operator
      channels:
      - name: stable-4.12
    - name: pipelines-operator
      channels:
      - name: stable-4.12
    - name: openshift-update-service
      channels
      - name: stable-4.11                          
  additionalImages:
  - name: registry.redhat.io/ubi8/ubi:latest                    
  helm: {}

The above config mirrors the 4.11.0, 4.11.40 and the 4.12.17 OCP releases, as per the upgrade path, as well as the desired operators required for updating and operating the cluster. Now lets run the oc-mirror command to generate the imageset and save the contents to disk, on removable media:

oc mirror --config=./imageset-config.yaml file://<path_to_output_directory>

Depending on your network speed and your imageset configuration, this will take some time. Once it is completed, you can then transfer the content into the disconnected environment, where it will be need to be pushed into the mirror registry using the same command.

Step 2 : Copy Contents into Mirror Registry

On the helper host in the disconnected environment, attach the removable media and use the oc-mirror plugin to mirror the contents of a generated image set to the target mirror registry.

oc mirror --from=./mirror_seq1_000000.tar docker://quay.domain.com:5000

This command updates the mirror registry with the image set and generates the ImageContentSourcePolicy and CatalogSource resources.

Step 3 : Apply the generated YAML manifests

This step will change the cluster settings to use the mirror registry instead of the upstream repositories.

  1. Navigate into the oc-mirror-workspace/ directory that was generated.
  2. Navigate into the results directory, for example, results-1639608409/.
  3. Verify that YAML files are present for the ImageContentSourcePolicy and CatalogSource resources.

Apply the YAML files from the directory to the cluster, using the oc apply command:

oc apply -f ./oc-mirror-workspace/results-1639608409/

Apply the release signatures to the cluster:

oc apply -f ./oc-mirror-workspace/results-1639608409/release-signatures/

Verify that the ImageContentSourcePolicy resources were successfully applied:

oc get imagecontentsourcepolicy --all-namespaces

Verify that the CatalogSource resources were successfully installed by running the following command:

oc get catalogsource --all-namespaces

Optional Step – Create the graph-data image

This should be done automatically when using oc-mirror, but I found that the last time I did this, there was a problem with the container and thus the pod would not run. So it may be necessary to manually create the graph-data image and push it into the mirror registry for the update service operator to function correctly.

Create a directory, download the graph data and tar the contents into the directory:

$ mkdir graph-data
$ wget https://mirror.openshift.com/pub/openshift-v4/clients/graph-data-4.12.0.tar.gz
$ tar -zxvf graph-data-4.12.0.tar.gz -C graph-data

Create the Dockerfile to build the image:

FROM registry.access.redhat.com/ubi8/ubi:8.1

RUN curl -L -o cincinnati-graph-data.tar.gz https://api.openshift.com/api/upgrades_info/graph-data

RUN mkdir -p /var/lib/cincinnati-graph-data && tar xvzf cincinnati-graph-data.tar.gz -C /var/lib/cincinnati-graph-data/ --no-overwrite-dir --no-same-owner

CMD ["/bin/bash", "-c" ,"exec cp -rp /var/lib/cincinnati-graph-data/* /var/lib/cincinnati/graph-data"]

It may be the case that you are not able to reach the internet to download the tar file. If so, download the tar file onto the removable media from the connected environment and copy across to the disconnected environment. The docker file will then look like this:

FROM registry.access.redhat.com/ubi8/ubi:8.1

COPY cincinnati-graph-data.tar.gz . 

RUN mkdir -p /var/lib/cincinnati-graph-data && tar xvzf cincinnati-graph-data.tar.gz -C /var/lib/cincinnati-graph-data/ --no-overwrite-dir --no-same-owner

CMD ["/bin/bash", "-c" ,"exec cp -rp /var/lib/cincinnati-graph-data/* /var/lib/cincinnati/graph-data"]

Build the Image:

podman build -f ./Dockerfile -t registry.example.com/openshift/graph-data:latest

Push the graph data container image to the mirror registry that is accessible to the OpenShift Update Service:

podman push registry.example.com/openshift/graph-data:latest

Conclusion

The steps above show how to use the oc-mirror command to setup a mirror registry in a completely disconnected environment. Keeping a consistent imagesetconfiguration file and filesystem location will maintain the content in mirror registry, auto-pruning if necessary.

One consideration is to ensure that the mirror registry has the same availability level as the cluster. If the registry is not available and the cluster tries to schedule new pods, it may not be able to download the images and thus, fail.

openshift, Tech Stuff

Automated OpenShift backups with OADP

I have recently been working with a client, assisting them with their OCP rollout and part of the delivery was to assist them with the backup all of the projects in their cluster/s. The simplest way to do this is by using the OADP Operator.

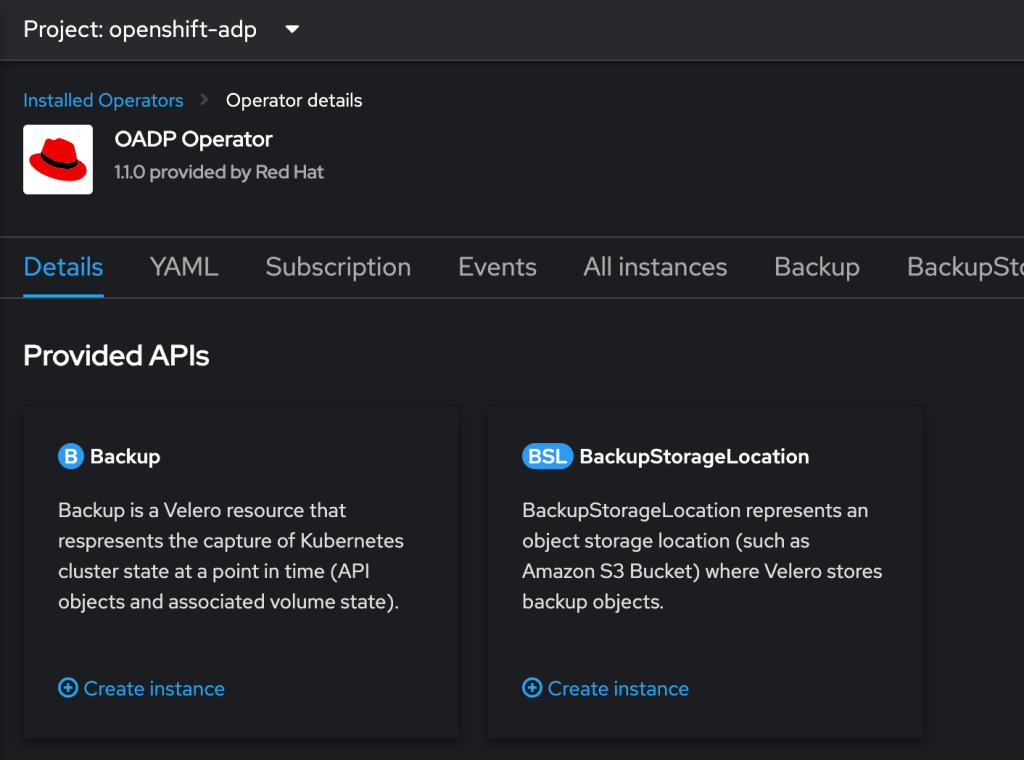
OADP (Openshift APIs for Data Protection) is an operator in Openshift, provided by Red Hat to create backup and restore APIs. It can be used to backup and restore cluster resources (yaml files), internal images and persistent volume data. I won’t go into the all the nitty gritty of OADP/Velero, more detailed information is provided here and here.

Installing the OADP Operator.

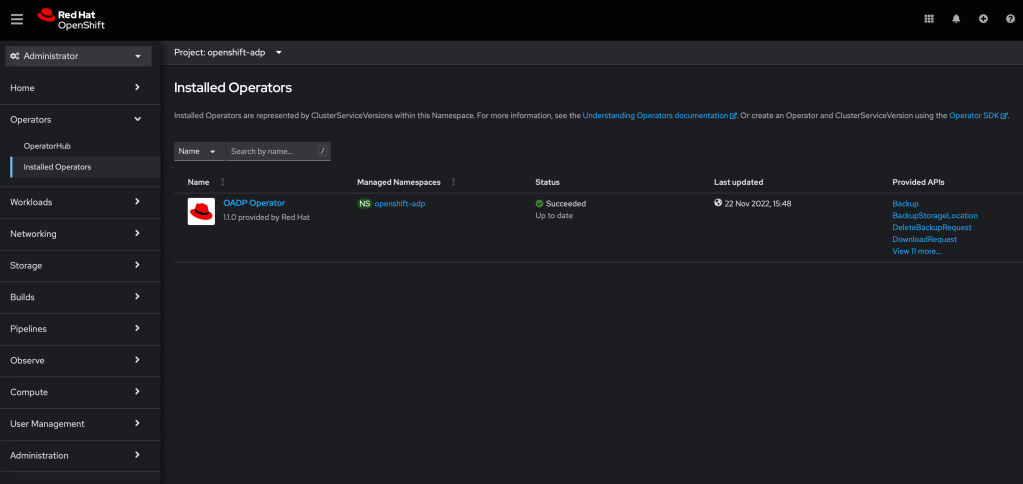
Let’s start with installing the OADP operator – which is really simple in Openshift. In the OCP console, click on Operators, search for the Red Hat OADP operator and install it. It will take a few minutes, but once done, the operator is ready and installed in the openshift-oadp namespace.

Setup Object Storage

It’s a good idea to setup the object storage you would like to backup to, before getting started with the OADP configuration. There are lots of examples, and over time, I will add additional storage providers, such as Azure/GCP/AWS/ODF. You can also use a private object storage platform, using Minio – but for this example, I will be backing up to a cloud based provider, Wasabi.

Wasabi – create bucket and access key

I have chosen Wasabi for this example because I like the interface and the pricing. There are plenty other providers which can also be configured and used in the same way.

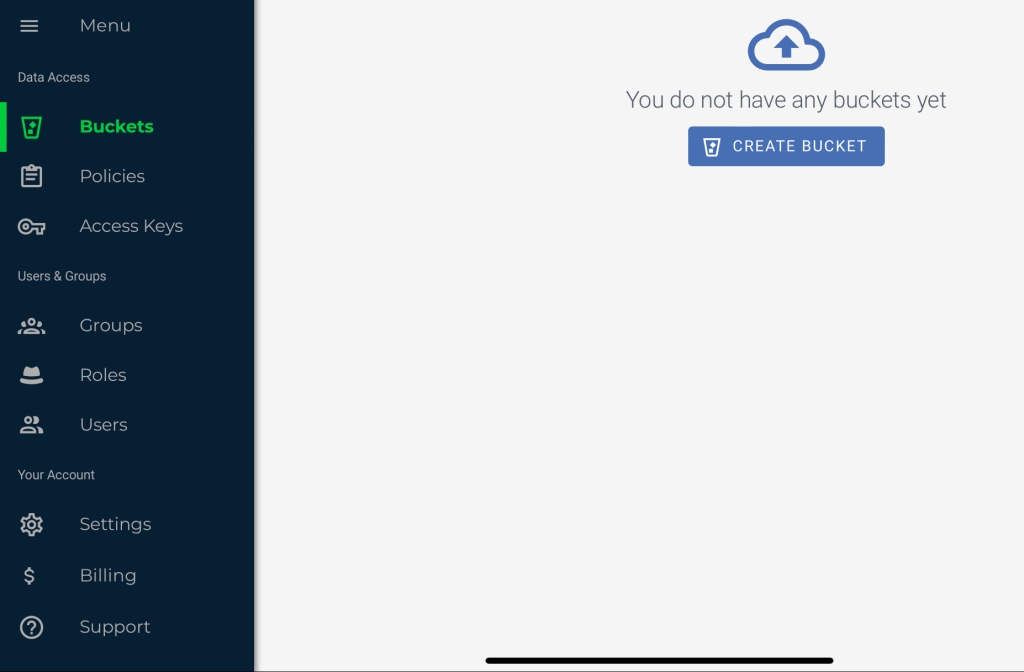
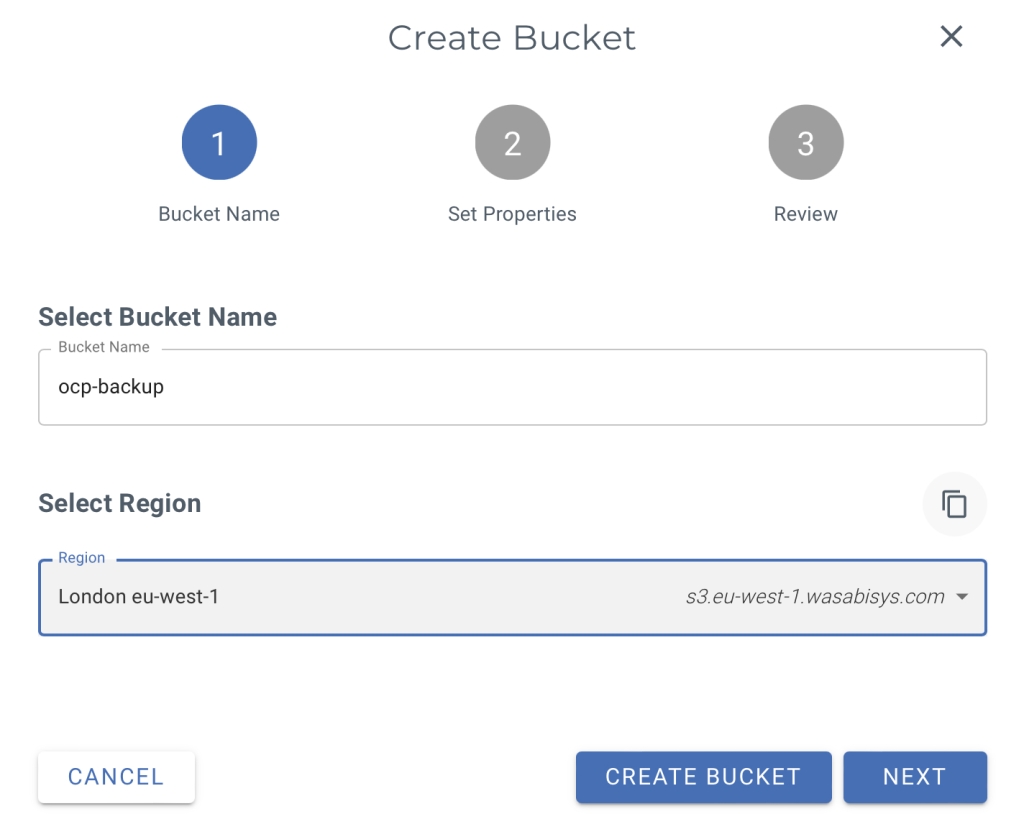
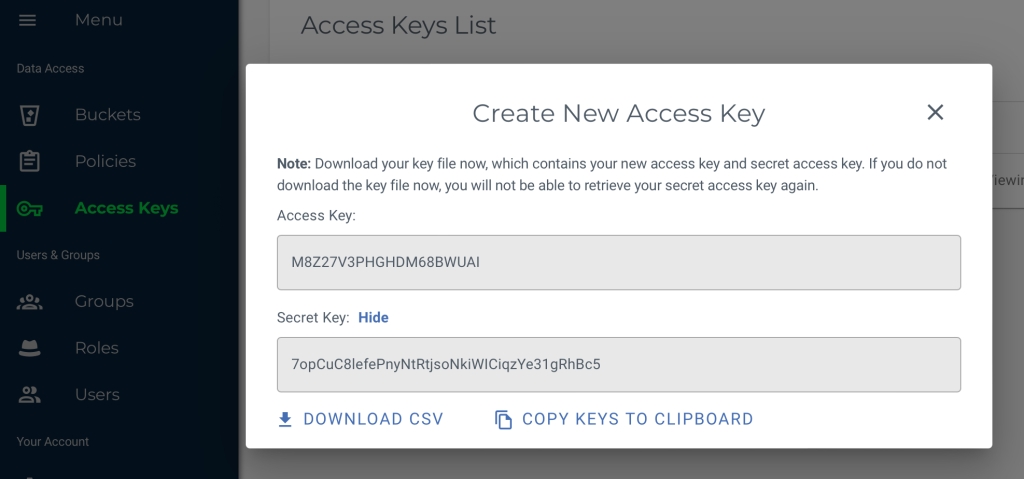
Wasabi provides AWS ‘S3 type’ object storage and as such, the provider is configured in OADP as being ‘aws’ – but we will get to that later. First thing is setup an account in Wasabi. Once that is done, create a bucket and create an access key. Make sure you make a note of the bucket name and SAVE THE ACCESS KEY CREDENTIALS SOMEWHERE SAFE!

Create cloud-credentials secret

Now that you have the access key and secret, created in the previous step, the next thing to do is to create the cloud-credentials secret in Openshift. Securely store the credentials in a file in a similar manner as below:

$ cat << EOF > ./credentials-wasabi
[default]
aws_access_key_id=<AWS_ACCESS_KEY_ID>
aws_secret_access_key=<AWS_SECRET_ACCESS_KEY>
EOF

Then create the secret using the oc command :

$ oc create secret generic cloud-credentials -n openshift-adp --from-file wasabi=credentials-wasabi

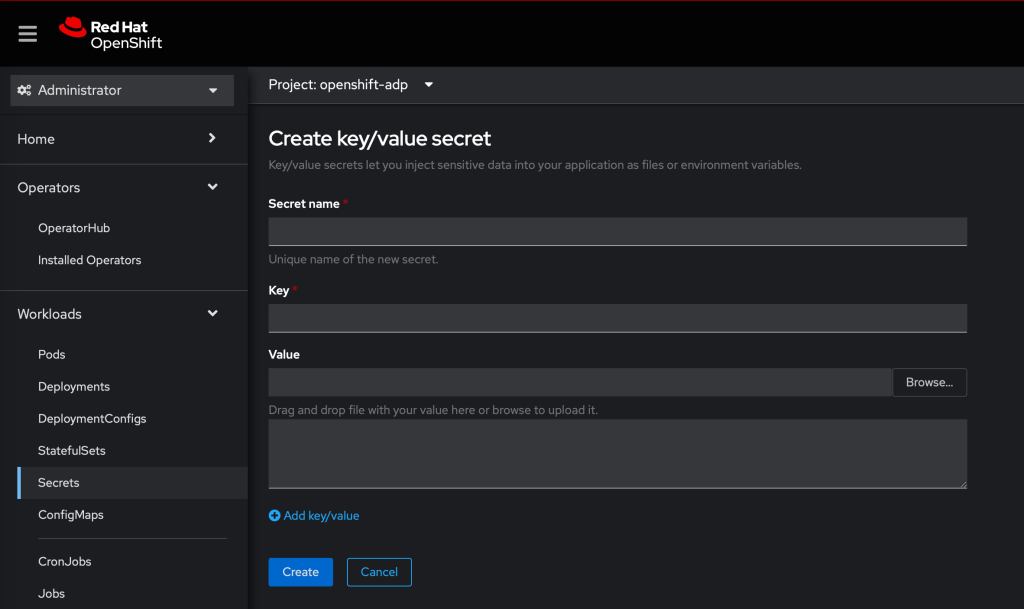
Alternatively, you can this using the OCP console, in administrator mode. Ensure that you are in the openshift-oadp workspace and then navigate to Workloads -> Secrets -> Create New Secret.

Create an instance of the Data Protection Application & Backup Storage Location/s

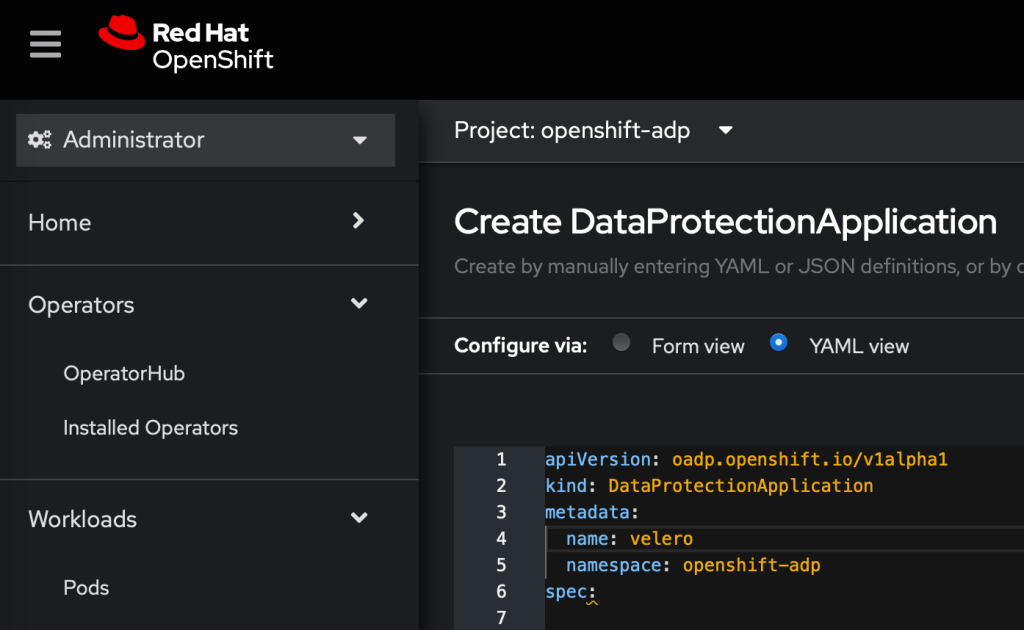
Log into the OCP console, switch to administrator mode and navigate to : Operators -> Installed Operators. Click on OADP operator. From the menu at the top, select DataProtectionApplication and click ‘Create DataProtectionApplication

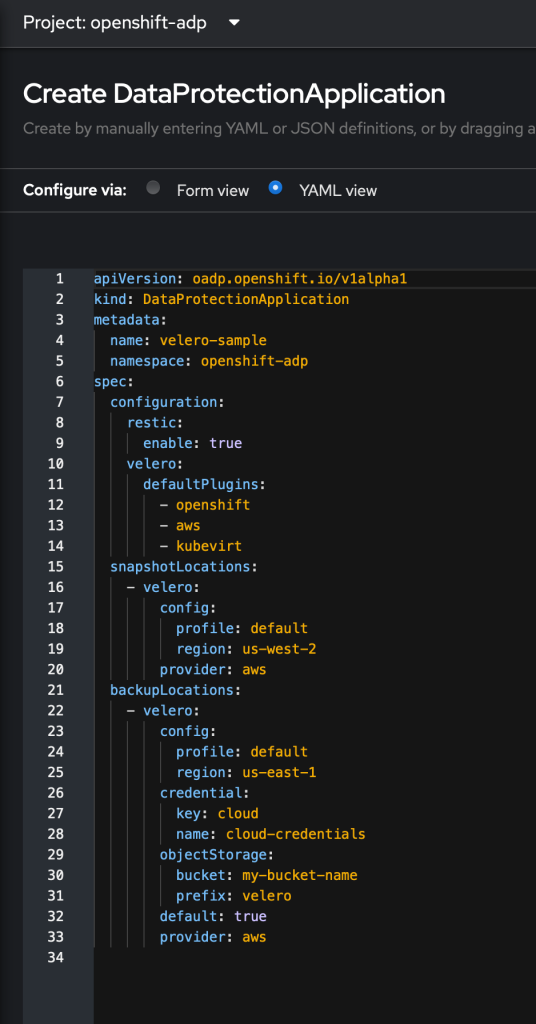
At this point I find it easier to switch to the YAML view and edit the configuration

Replace the name to something you prefer and remove everything below the spec: directive.

Underneath the spec: we can set the configuration:

kind: DataProtectionApplication
apiVersion: oadp.openshift.io/v1alpha1
metadata:
  name: velero
  namespace: openshift-adp
spec:
  configuration:
    restic:
      enable: true
    velero:
      defaultPlugins:
        - openshift
        - aws
        - kubevirt
  backupImages: true
  backupLocations:
    - name: wasabi-s3
      velero:
        config:
          profile: default
          region: us-east-1
          s3ForcePathStyle: 'true'
          s3Url: 'https://s3.wasabisys.com'
        credential:
          key: wasabi
          name: cloud-credentials
        default: true
        objectStorage:
          bucket: ocp-backup
          prefix: velero
        provider: aws
  snapshotLocations:
    - velero:
        config:
          profile: default
          region: us-east-1
        provider: aws

This part is the configuration, which sets up the default plugins and enables restic backups any pod volumes. For this example, we are backing up to s3 storage, therefore the aws plugin is required. Other plugins are used for different storage types : azure, gcp etc. The backupImages specifies if you wish to backup images or not.

The next part of the configuration is the backup location. Here I have configured a backup location to use the wasabi s3 object storage that I setup earlier. The region and s3Url must be configured to as per the provider’s configuration.

The configuration is set to use the cloud-credentials secret and retrieve the access and secret data from the key named ‘wasabi’ – which I created earlier.

The next parts of the config defines the object storage configuration – set the bucket name, any prefix folder you wish to use and the provider – in this example, aws.

Lastly, I want to setup the location for snapshot backups.

Click ‘Create’

This can also be done using the oc command:

oc create -n openshift-adp -f oadp.yaml

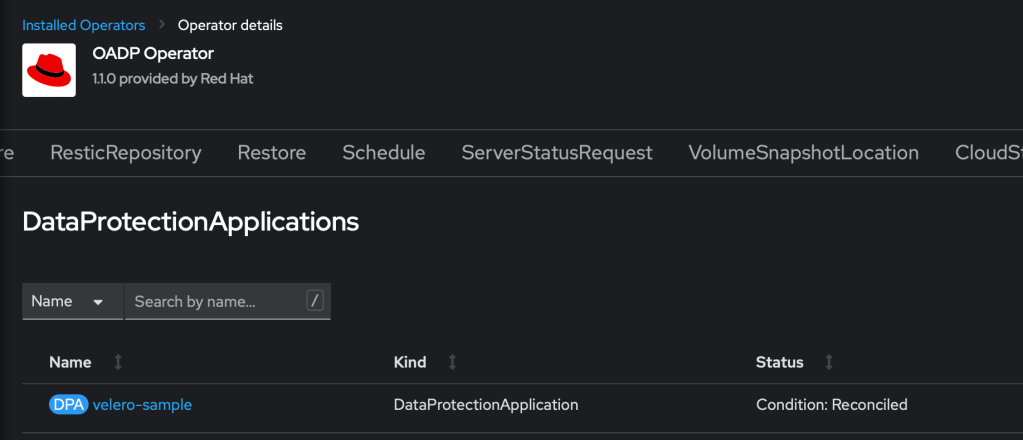
We now see the created application:

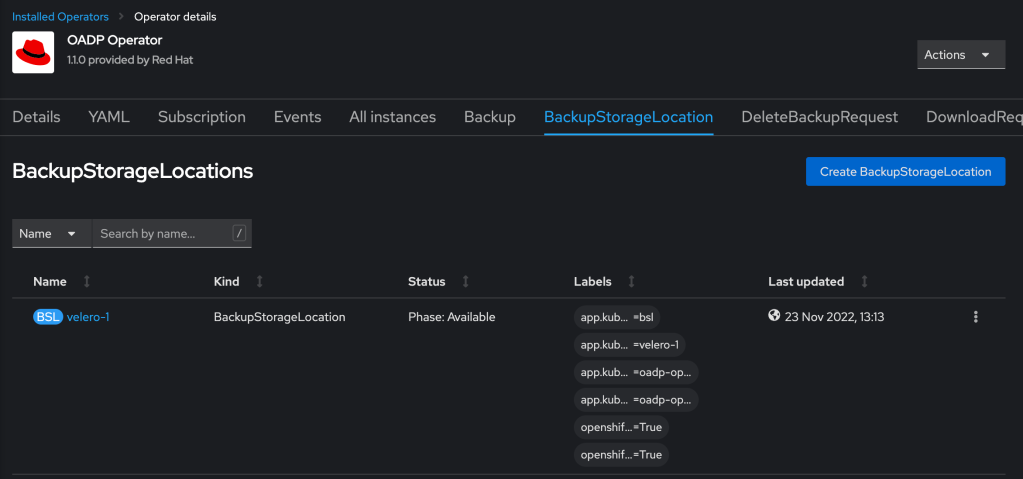
Check that the status is ‘Reconciled’ and then click on BackupStorageLocation. There will be a configured storage location, which was configured when setting up the DataProtectionApplication

Create a Backup!

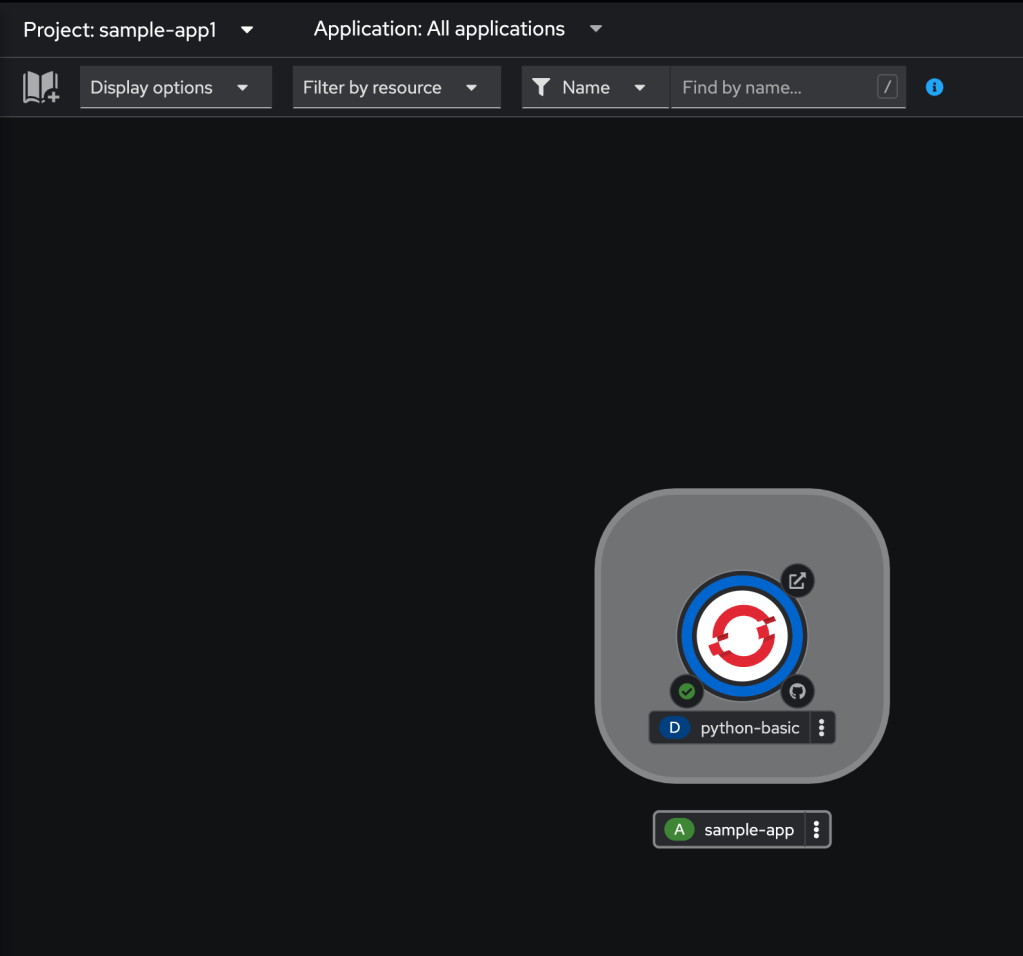
We are now able to backup a project / namespace! In the example here, I will backup an application – in this case, I am using the python-basic sample application, which is running in the sample-app1 project.

To execute a backup – return the OADP operator and create a backup instance.

There is a form which can be used to configure the backup, or select the yaml tab and edit the yaml directly. In this example, I will edit the yaml to configure the backup as follows:

apiVersion: velero.io/v1
kind: Backup
metadata:
  name: backup
  namespace: openshift-adp
spec:
  includedNamespaces:
    - sample-app1
  defaultVolumesToRestic: true
  storageLocation: velero-1

It is quite a simple configuration to determine which namespaces should be backed up, whether to backup pod volumes and where to backup to. Upon clicking create, the backup will begin and the status will show ‘InProgress’ and if all goes well, it should then show as ‘Completed’

Restore Backup to Different Namespace

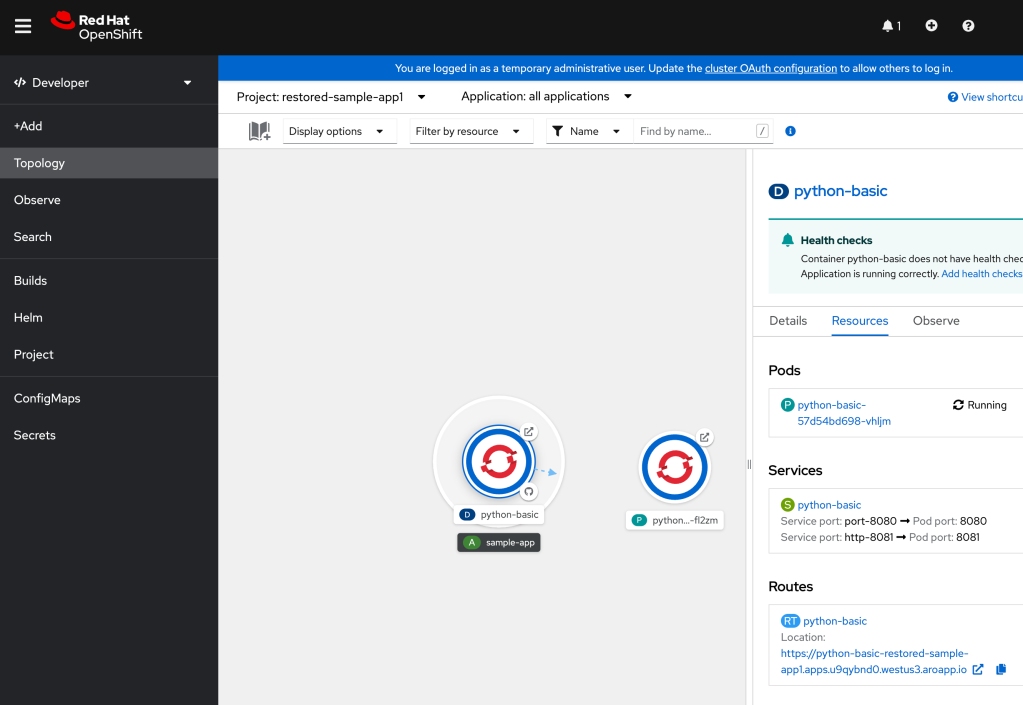
Now that there is a successful backup (and you can check in your S3 bucket to verify it is there), it is possible to conduct a restore. In this example, I will restore the backup to a different project/namespace – restored-sample-app1

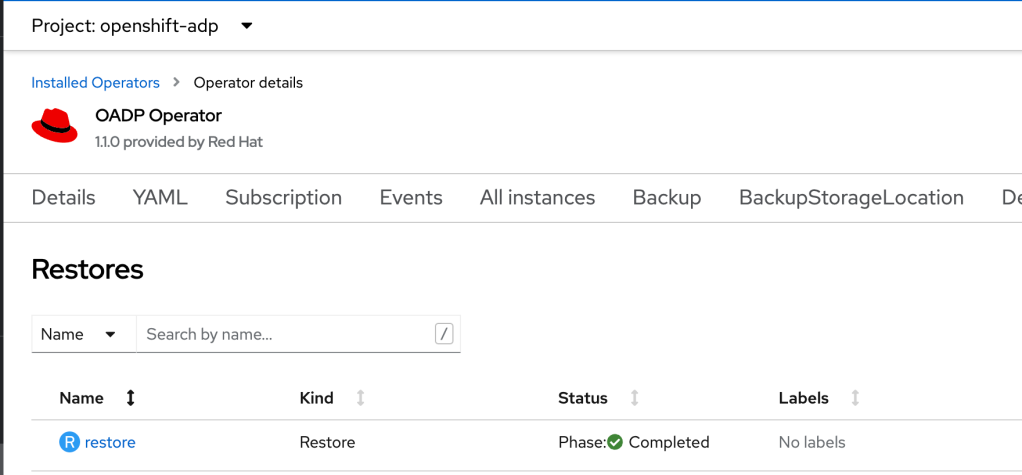
Return to the OADP operator and click on Restore and then select ‘Create Restore’. Again here, there is a form to complete or switch to yaml view, for consistency, this example will show the yaml config

apiVersion: velero.io/v1
kind: Restore
metadata:
  name: restore
  namespace: openshift-adp
spec:
  includedNamespaces:
    - sample-app1
  namespaceMapping:
    sample-app1: restored-sample-app1
  backupName: backup

Again the configuration is quite simple – select the backup name of the backup we created, include the namespace (if left blank it will restore all namespaces) and the interesting bit is the namespaceMapping – we want to restore sample-app1 to restored-sample-app1. Click create. Again, the status will show ‘InProgress’.

At this point, it is possible to change to the new namespace and switch to developer view, to view the progress of the restore.

Scheduled Backups.

For obvious reasons, you may not want to be conducting manual backups, so a good option is to create a schedule to fit your backup requirements. Navigate to the OADP operator and click on the Schedule tab and click Create Schedule. Again, there are options to either complete the form or edit the yaml. I prefer to edit the yaml:

apiVersion: velero.io/v1
kind: Schedule
metadata:
  name: daily-backup-1am
  namespace: openshift-adp
spec:
  schedule: 00 1 * * *
  template:
    defaultVolumesToRestic: true
    includedNamespaces:
      - sample-app1
    storageLocation: velero-1

The schedule configuration is fairly straight forward – it uses cron notation to determine when to backup. There are also options to backup up volumes, as was present in the backup configuration, earlier. The remaining configuration items are the namespace/s to backup and the location to backup to.

This schedule will run at 1am every day, backing up the sample-app1 namespace to the velero-1 backup storage location.

Conclusion

The above demonstration shows how to create and restore backups in Openshift, using the OADP / velero operator, to a S3 cloud storage provider (Wasabi). The demonstration also highlights how to restore to a different namespace, on the cluster and how to run backups periodically, using a schedule.

One last note/thought to consider when doing backups is that secrets are not encrypted. So it is highly recommended to use a storage solution / provider that provides data @ rest protection.

Feel free to add any comments / corrections / suggestions! If you found this helpful and would like to buy me a coffee, I would greatly appreciate it!

Buy Me A Coffee